当我们打开Local Settings文件拒绝访问时。 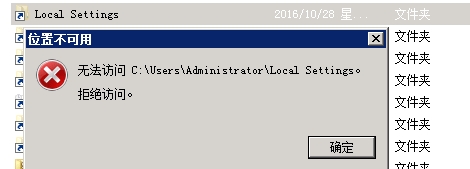 第一步,Local Settings文件右键,在菜单栏中选择-属性-运行。 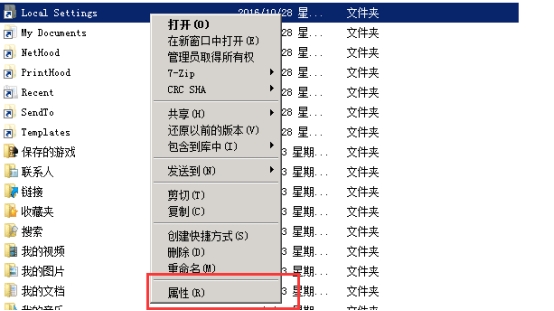 第二步,在Local Settings属性中选择安全>高级>Local Settings的高级安全设置>Everyone>更改权限。 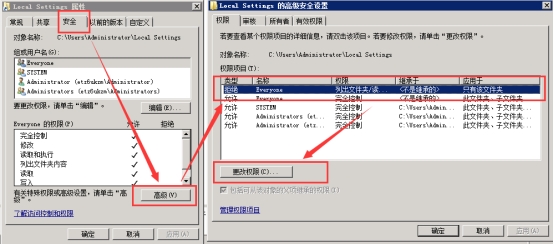 第三步,在Local Settings的高级安全设置的权限窗口选择编辑>Local Settings的权限项目>勾选允许完全控制>确认>应用。 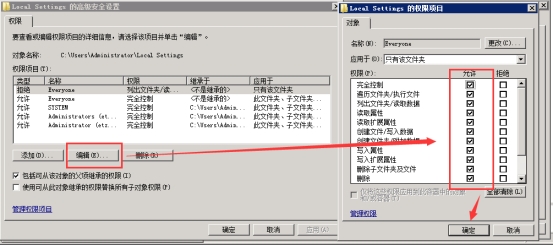 完成以上设置后,这时我们就可以打开Local Settings文件了。 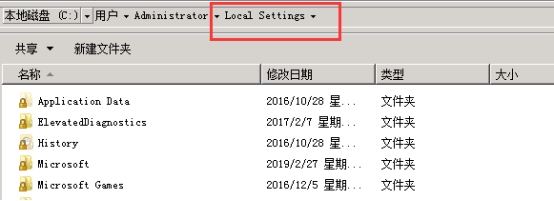
拓扑如下图所示:

A\B为不同地区的两套网络,需要通过配置GRE实现网络安全连接。
配置步骤如下:
1.配置基本的ip地址
2.配置两台防火墙之间的路由可以到达,采用静态路由配
3.配置防火墙与所属区域内网的域间策略通过
4.配置tunnel 口 ,其中协议为gre协议,源地址为防火墙出口
5.目的地址为另一个防火墙的出口。
6.配置到达对端区域内网的静态路由,下一跳是在tunnel 口上。
具体配置如下:
防火墙FW1:
interface GigabitEthernet1/0/3.1

vlan-type dot1q 10 \\vlan的类型打标签为10

ip address 10.1.1.254 255.255.255.0

ospf network-type p2p \\ospf的网络类型为p2p缩短建立邻居时间

service-manage ping permit

interface GigabitEthernet1/0/3.2

vlan-type dot1q 20

ip address 10.1.2.254 255.255.255.0

ospf network-type p2p

service-manage ping permit

interface GigabitEthernet1/0/4

undo shutdown

ip address 200.1.1.1 255.255.255.0

service-manage ping permit

interface Tunnel0

ip address 172.1.1.1 255.255.255.0

tunnel-protocol gre

source 200.1.1.1

destination 100.1.1.1

firewall zone local

set priority 100

firewall zone trust

set priority 85

add interface GigabitEthernet0/0/0

add interface GigabitEthernet1/0/3

add interface GigabitEthernet1/0/3.1

add interface GigabitEthernet1/0/3.2

firewall zone untrust

set priority 5

add interface GigabitEthernet1/0/4

add interface Tunnel0

静态路由的配置:

ip route-static 20.1.0.0 255.255.0.0 Tunnel0

ip route-static 100.1.1.0 255.255.255.0 200.1.1.2

防火墙的域间策略:

security-policy

rule name t_u

source-zone trust

destination-zone untrust

action permit

rule name u_t

source-zone untrust

destination-zone trust

action permit

rule name l_u

source-zone local

destination-zone untrust

action permit

rule name u_ll

source-zone untrust

destination-zone local

action permit

防火墙FW2配置:

interface GigabitEthernet1/0/3.1

vlan-type dot1q 10

description vl10

ip address 20.1.1.254 255.255.255.0

ospf network-type p2p

service-manage ping permit

interface GigabitEthernet1/0/3.2

vlan-type dot1q 20

description vl20

ip address 20.1.2.254 255.255.255.0

ospf network-type p2p

service-manage ping permit

interface GigabitEthernet1/0/4

undo shutdown

ip address 100.1.1.1 255.255.255.0

service-manage ping permit

tunnel 0的ipv4地址:

interface Tunnel0

ip address 172.1.1.2 255.255.255.0

tunnel-protocol gre

source 100.1.1.1

destination 200.1.1.1

把接口加入防火墙的安全区域:

firewall zone trust

set priority 85

add interface GigabitEthernet0/0/0

add interface GigabitEthernet1/0/3

add interface GigabitEthernet1/0/3.1

add interface GigabitEthernet1/0/3.2

firewall zone untrust

set priority 5

add interface GigabitEthernet1/0/4

add interface Tunnel0

配置到达公网与私网的静态路由:

ip route-static 10.1.0.0 255.255.0.0 Tunnel0

ip route-static 200.1.1.0 255.255.255.0 100.1.1.2

配置防火墙的域间策略:

security-policy

rule name t_u

source-zone trust

destination-zone untrust

action permit

rule name u_t

source-zone untrust

destination-zone trust

action permit

rule name l_u

source-zone local

destination-zone untrust

action permit

rule name u_ll

source-zone untrust

destination-zone local

action permit
很多时候,我们新建记事本文件,都是在桌面右键点击新建,但最近,有些使用windows10系统的用户,就遇到了个桌面点击右键,新建中没有记事本文件的问题,导致想用记事本的时候,不知道应该怎么办。本文将针对此问题进行详细说明。
1.按 “Win R” 组合键,打开“运行”,并输入:%SYSTEMROOT%\notepad.exe 命令行然后回车,可以快速进入文本文档。

2.然后在文本中输入以下代码:
Windows Registry Editor Version 5.00
[HKEY_CLASSES_ROOT\.txt]
@="txtfile"
"Content Type"="text/plain"
[HKEY_CLASSES_ROOT\.txt\ShellNew]
"NullFile"="" [HKEY_CLASSES_ROOT\txtfile]
@="文本文档"
[HKEY_CLASSES_ROOT\txtfile\shell]
[HKEY_CLASSES_ROOT\txtfile\shell\open]
[HKEY_CLASSES_ROOT\txtfile\shell\open\command]
@="NOTEPAD.EXE %1"

3.输入完成后使用快捷键“Ctrl Shift S”另存为,存放在“桌面”即可,然后文件名可以随意,但是后缀一定要为:.reg,然后点击“保存”。

4.双击刚刚保存在桌面的文件,因为要添加注册表,所以注册表编辑器会弹出提示框,直接点击“是”即可。

5.最后重启电脑,在桌面点击右键,就能新建文本文档了。
在Debian 9系统下使用ifconfig命令出现如下图提示信息时,如何设置可以正常使用呢?
![]()
1.输入apt install net-tools按回车键安装工具包

2.安装完成后即可正常使用

Centos7系统如何使用telnet远程机器?本教程以Centos7系统为例
本配置适用于Centos6,7版本
1.yum安装telnet
yum -y install telnet telnet-server xinetd
2.设置xinetd开机自启
systemctl enable xinetd.service
3.设置telnet开机自启
systemctl enable telnet.socket
4.启动telnet服务
systemctl start telnet.socket
systemctl start xinetd5.查看telnet服务是否启动
netstat -antupl | grep 23
6.telnet远程连接(本机测试)
6.1 telnet本地测试(root用户测试)
telnet 127.0.0.1
注:以上截图看见了显示登录错误,默认情况下不允许root用户登陆,安全原因,具体查阅telnet协议。如果想启用root登陆,编辑/etc/pam.d/login文件将auth requisite pam_securetty.so 这行注释掉即可!第二种:移除securetty文件mv /etc/securetty /etc/securetty.bak


6.2 telnet本地测试(普通用户测试)
telnet 127.0.0.1

注:用普通用户测试登陆没问题,那就说明telnet没问题!
执行命令查看机器重启记录 last -f /var/log/wtmp --time-format iso reboot  2022-11-02T10:16:58+0800 第4列表示开机时间 2022-11-02T10:16:58+0800 第5列表示关机时间 (01:46) 表示本次机器运行总时长 Still running 表示当前运行中
Centos7系统如何使用whereis命令查找已安装的程序路径?本教程以Centos7系统为例
本配置适用于Centos6,7版本
1.whereis 命令名
#搜索命令所在路径及帮助文档所在位置
选项:
-b :只查找可执行文件位置

-m:只查找帮助文件

[root@localhost ~]# whereis ls

ls: /usr/bin/ls /usr/share/man/man1/ls.1.gz
[root@localhost ~]# whereis -b ls

ls: /usr/bin/ls
[root@localhost ~]# whereis -m ls

ls: /usr/share/man/man1/ls.1.gz
我们可以查到ls命令的位置以及帮助文档的位置
1.右键点击对应连接,选择“连接属性” 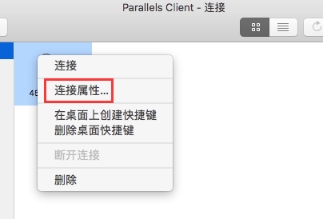 2.点选“本地资源”,选择磁盘驱动器的“配置” 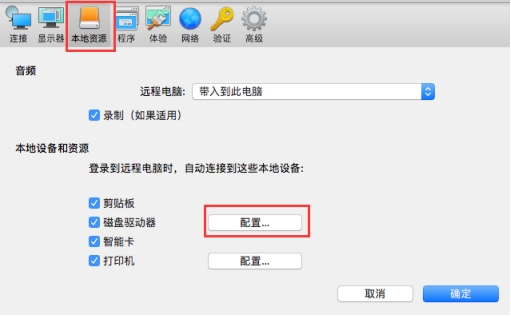 3.点击“+” 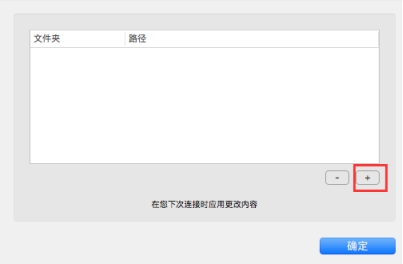 4.选择需要挂载的文件目录,然后点击“打开”  5.点击“确定” 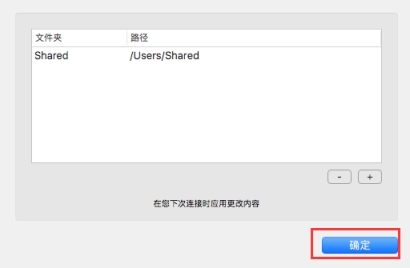 6.点击“确定”  7.远程连接桌面后可以查看到挂载的文件目录,进入对应目录下可以操作拷贝文件 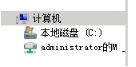
按时产品注册即享免费测试https://www.qg.net/business/proxyip.html

按时产品直接测:
动态独享(8小时)
动态共享(8小时)
静态独享(2小时)
隧道每次请求更换(2小时)
隧道固定时间更换(4小时)
二、1万个短效代理IP领取流程

直接下单选择购买资源包,选择1-5分钟IP数量选择1万个,生成订单。
微信扫码与客户经理联系,将订单号发送给客户经理,让其修改价格。
客户经理修改价格后,去订单使用0元支付订单即可。
注意:赠送的短效IP有效期为2年,在此期间使用均可。

三、其他测试需求申请
如官网提供的测试规格无法满足您的测试需求,也可以联系我们的客户经理进行沟通确认,帮您1V1提供解决方案和测试申请。
各产品差异
动态独享:自由控制存活时长(0-24小时),高带宽高质量保证任务效率,灵活可控,购买的通道数量即同一时间存在的IP数量。
动态共享:存活时长根据选择套餐而定,单价较独享低,需要大量ip的场景使用,有按时、按量两种方式选择,按时产品的通道数量即同一时间存在的IP数量。
静态独享:满足超长存活周期、IP不需要频繁变更的业务,存活时长24小时起 您不释放他就不会变。
隧道代理:云端自动帮您更换ip,分每次请求更换和固定时长更换可根据您具体需求选择购买,简单使用易上手。
debian8系统如何用dos2unix将dos格式文件转为unix格式?本教程以debian8系统为例
本配置适用于debian8,9版本
1.介绍
dos2unix命令用来将DOS格式的文本文件转换成UNIX格式的。
2.debian系统需要安装此命令dos2unix
apt-get install dos2unix -y
3.我们vi进入文本模式

只显示此信息的话就代表此文本是dos格式
输入命令dos2unix test

现在我们再vi进入test文本模式查看

无提示这个就是此文本已经是unix格式


